A little late, but the fourth is tomorrow! I was thinking of so many tutorials I could do, but I thought this would be a good start. Here are four quick and easy nail DIY's.
Nail Water Marbling

|
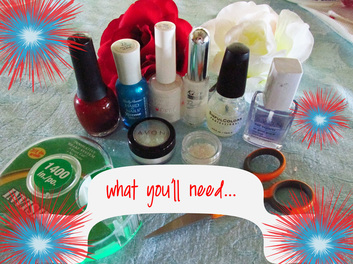
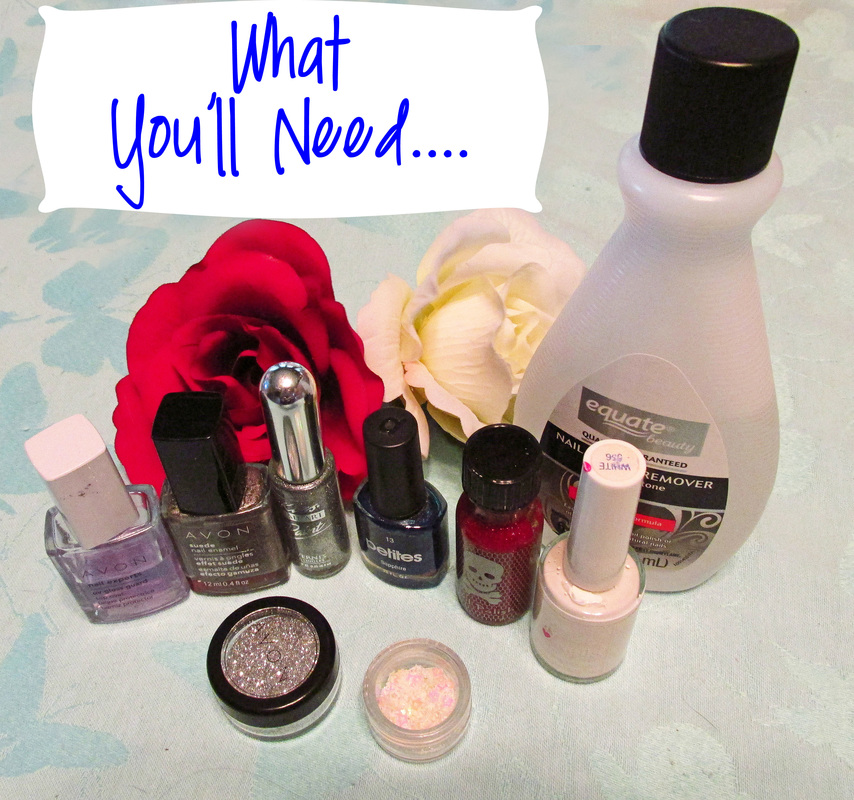
What You'll Need….
White: Love My Nails in white - not preferred brand. Red: Finger Paints (I love this brand) in Romanticism Ruby Clear/Top coat: Avon, UV gloss guard. Seriously the best clear nail polish I've ever used. Stars: From Sally's |
|
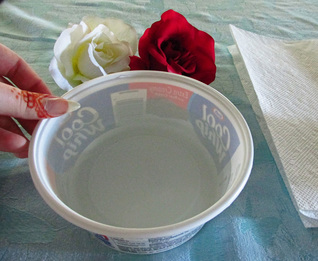
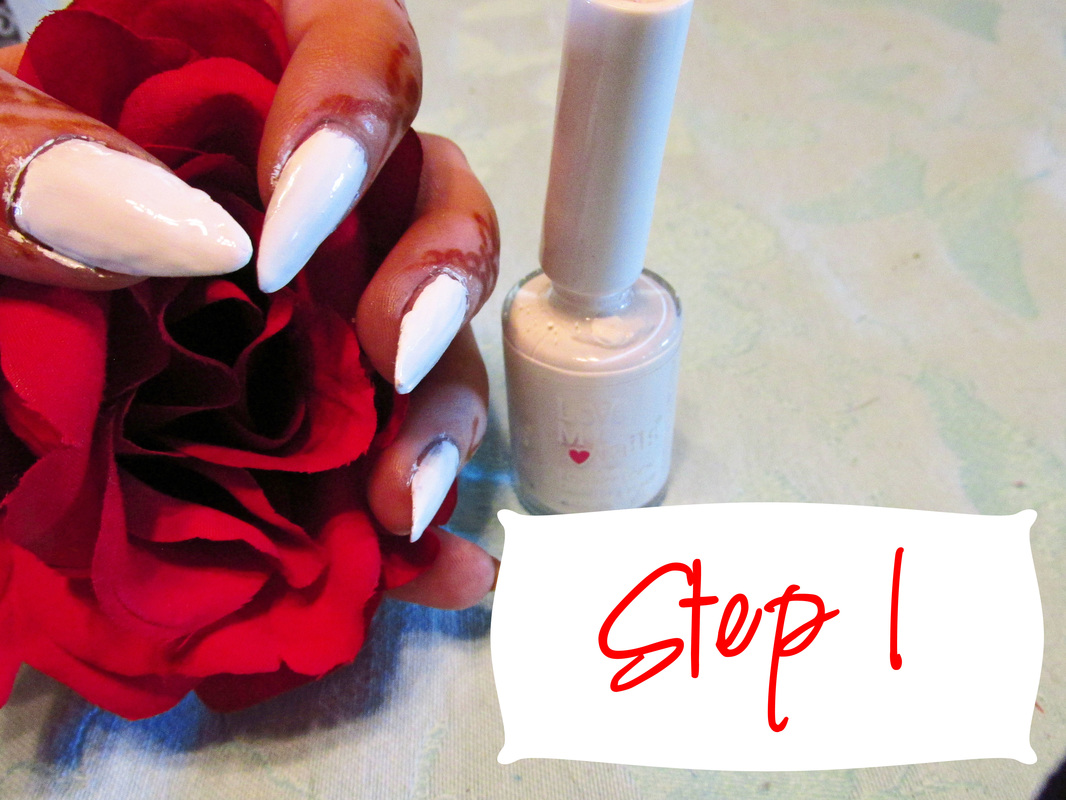
STEP 1
Fill that fancy bowl/container of yours with water. A little over halfway is perfect, but you should take in consideration the size of the bowl when filling. |
|
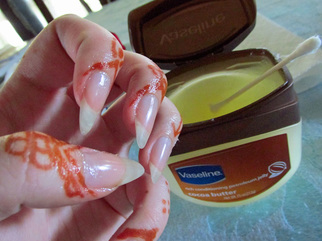
STEP 2
Take your petroleum jelly/vaseline (I'm using one with cocoa butter, which you don't have to), and your Q-tip and apply all around your skin by your nails. This helps keep all of the polish off/makes it easily removable if you get polish on that area. |
|
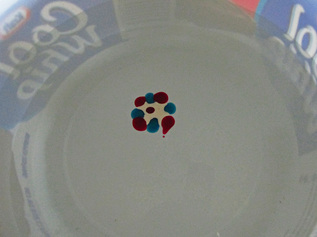
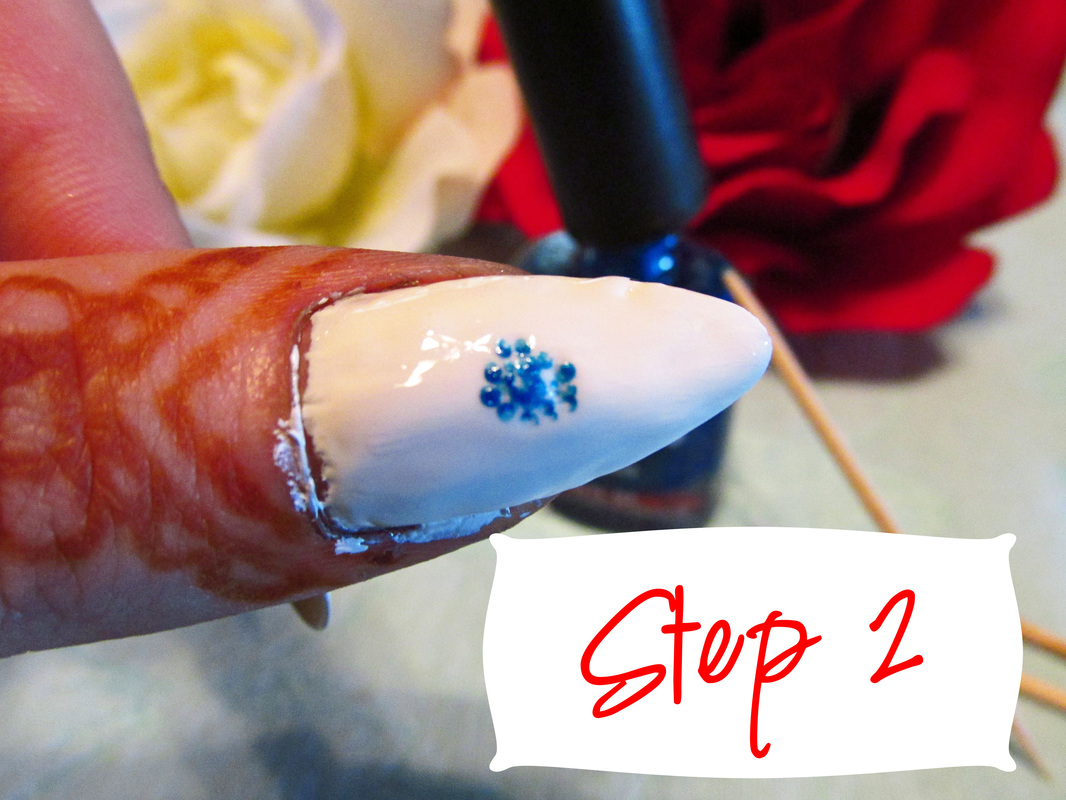
STEP 3
Take your nail polish and drip it into the water. This is wear you can start getting creative! |
|
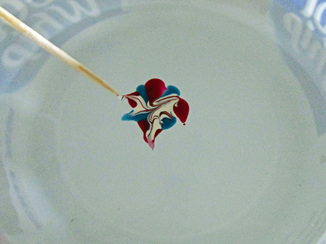
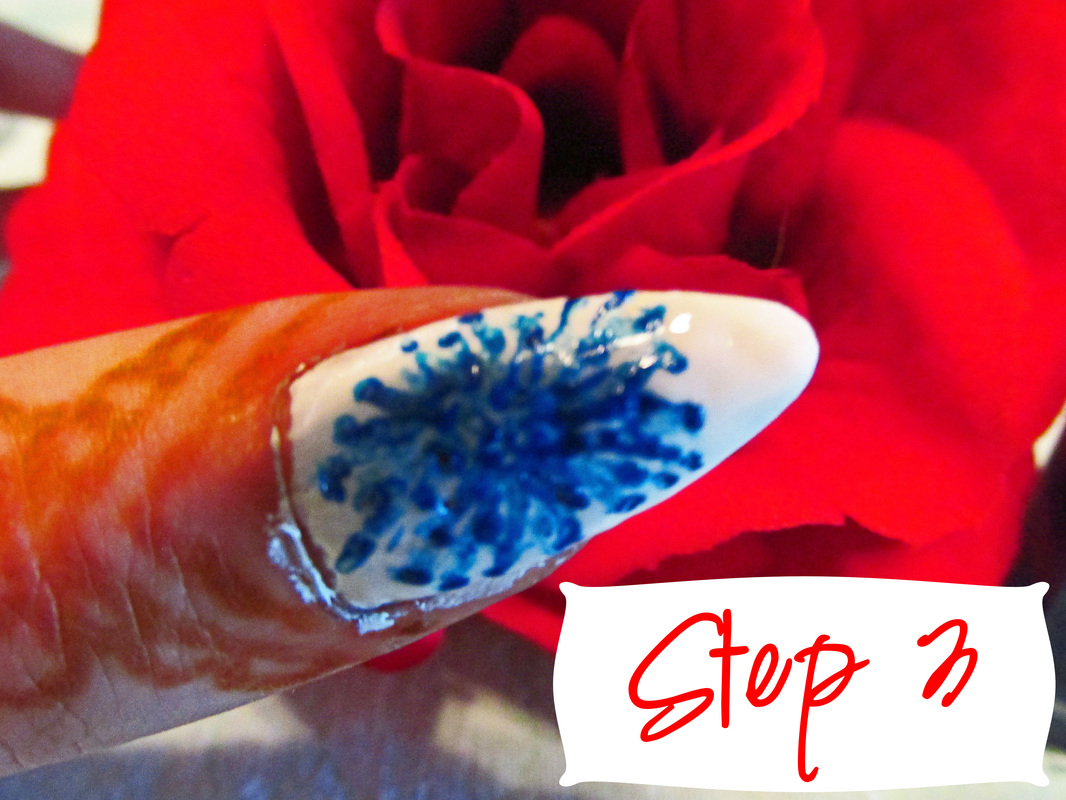
STEP 4
Once you've dripped your polish into the water, you have to move fast. Grab a toothpick and start pulling the colors through each other! This is the really creative part, and every design and every nail will come out a little differently. That's the reason that water marbling is so fun, you never know what you're going to get! |
|
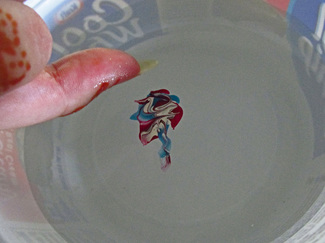
STEP 5
Quickly after making your design, face your finger above the water, nail side down. This can sometimes be a tricky process. You need to stick your nail as flat as you can on the polish and then scoop the polish onto your nail. Don't get frustrated if it doesn't come out perfectly the first time, you can keep trying until you love the design. |
|
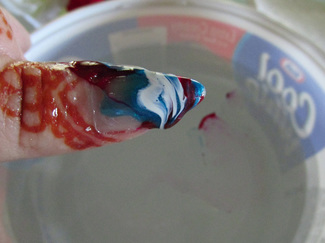
STEP 6
After doing the scooping, your nail will probably look similar to this. Thankfully there's vaseline on your finger, so you can just use a q-tip and get all of that polish off! |
|
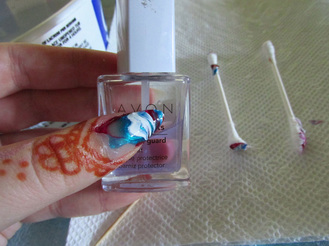
STEP 7
Wait for the design to dry on your nail, then apply your topcoat UV gloss. This will seal the polish and give it an even glossier top. If you'd like, you can always use a glitter nail polish as your topcoat! |

STRIPES
|
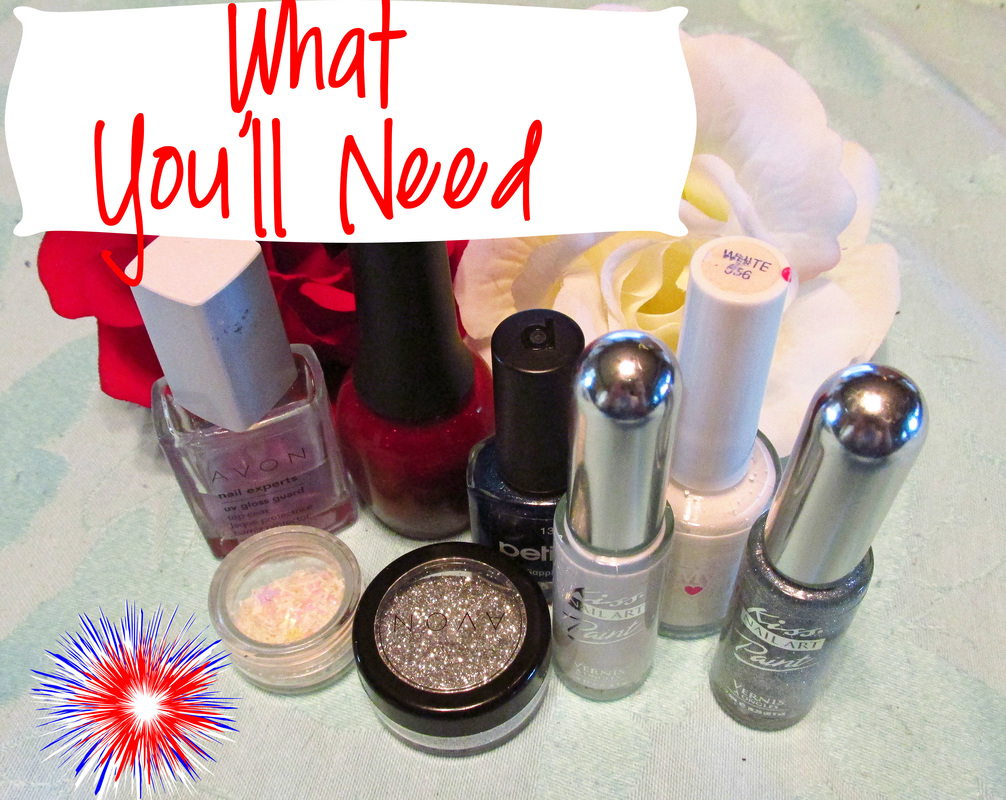
What You'll Need….
White (then tall bottle): Kiss nail art Paint from Sally's Blue: Sally Handsen Hard as Nails #23 Marine Scene. I wish I used Petites in Sapphire because it's a darker blue. Red: Finger Paints in Romanticism Ruby - Sally's Glitter top coat: Sinful Colors Professional in Pearl Harbor Sealing top coat/clear: Avon in UV gloss guard. |
|
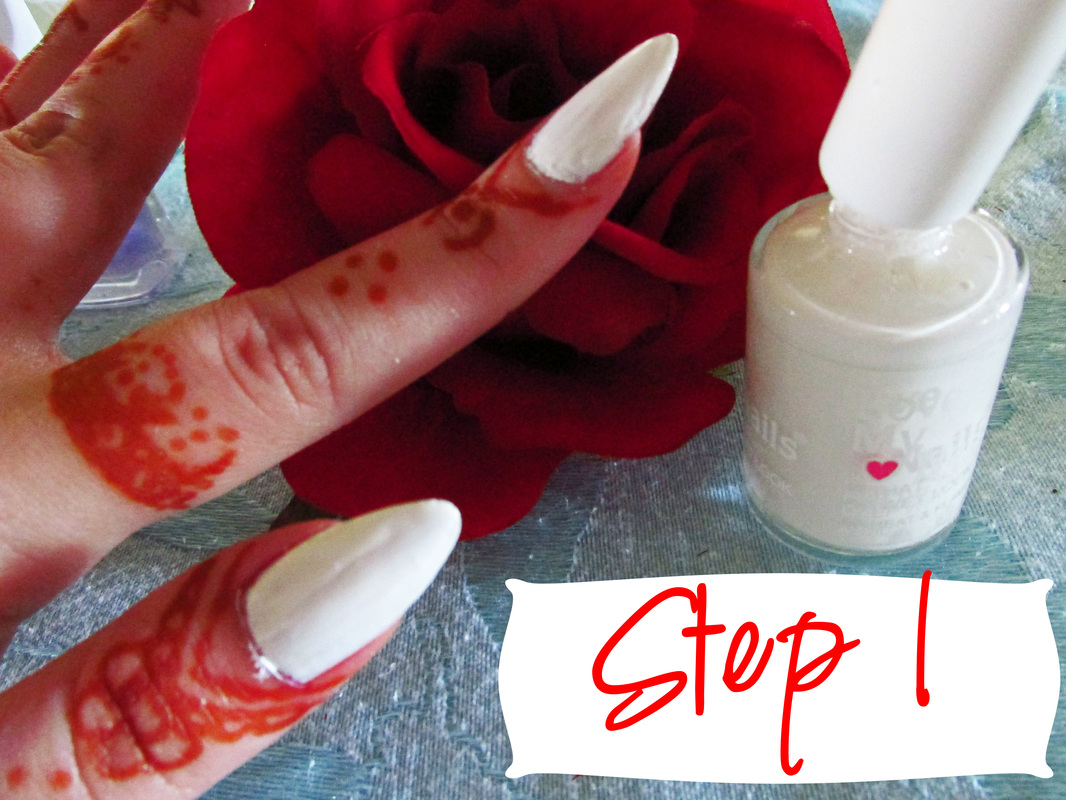
STEP 1
Paint your nails white - try not to get it too thick. This was my biggest problem, and I can say that this polish reflects it's price because it likes to goop up. |
|
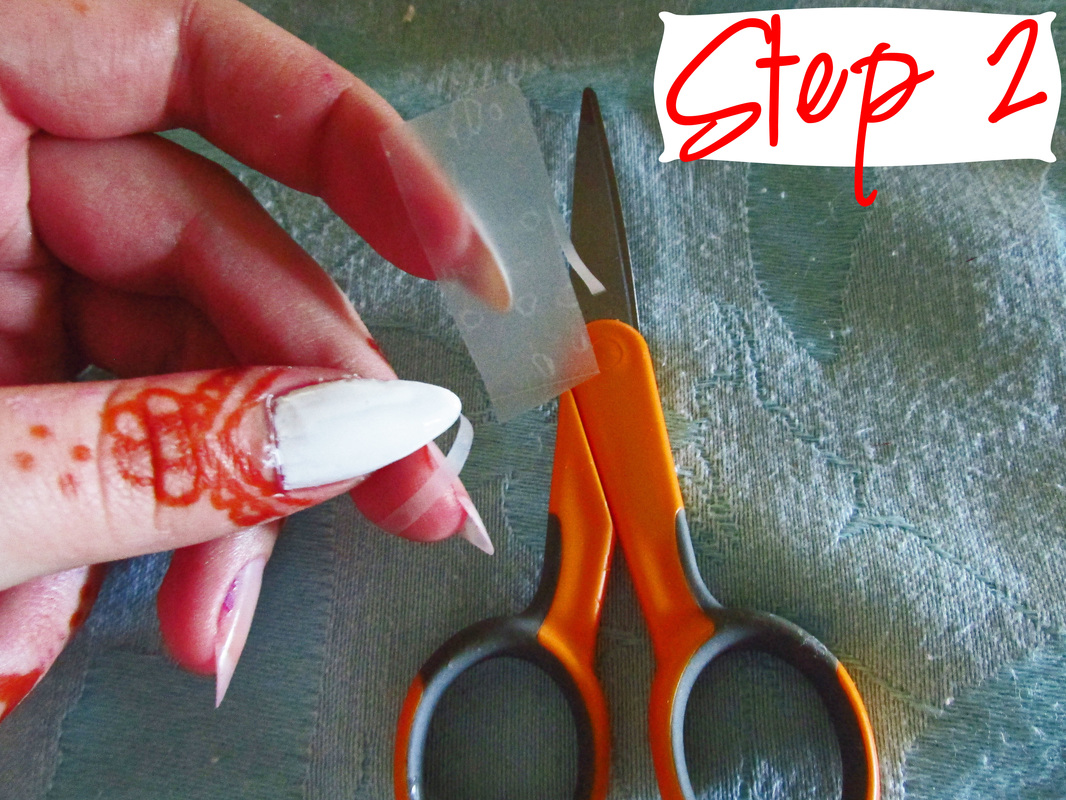
STEP 2
Once the white has dried, take a piece of tape and your scissors and cut some strips. Really make sure your nails are dry, if they aren't, this could easily mess up the polish. Place the cut tape pieces on top of your white coat in strips. |
|
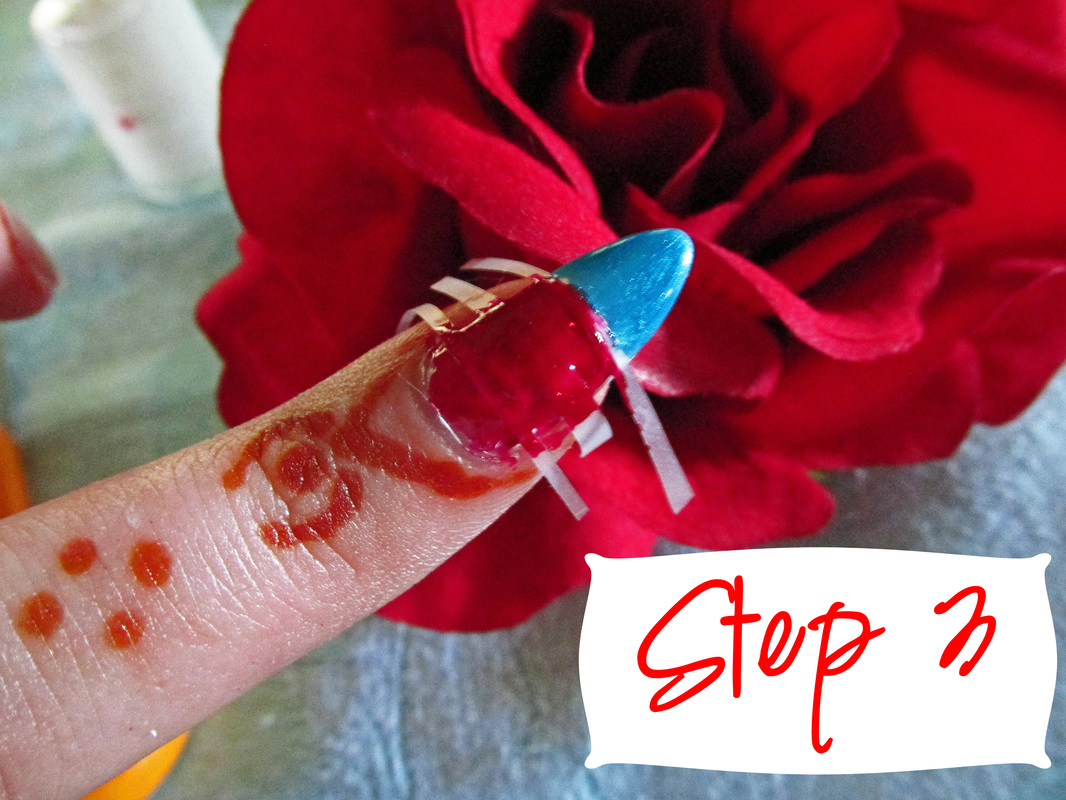
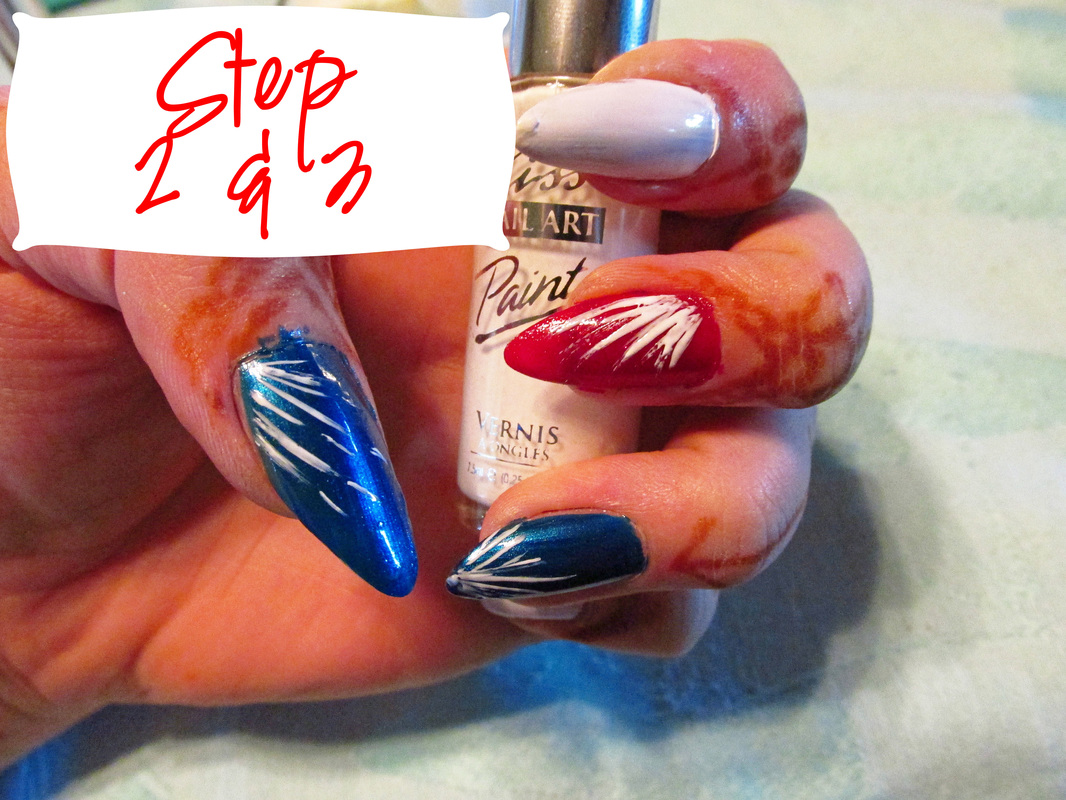
STEP 3
Once your strips are across your nail (I left the tip), begin painting red over the strip area and blue on the tip of your nail. Make sure you don't wait too long before peeling the tape off. If you leave the tape on for even 3-5 minutes it could peel your lower white polish off. And that's extremely frustrating, it actually happened a few times - oops! |
|
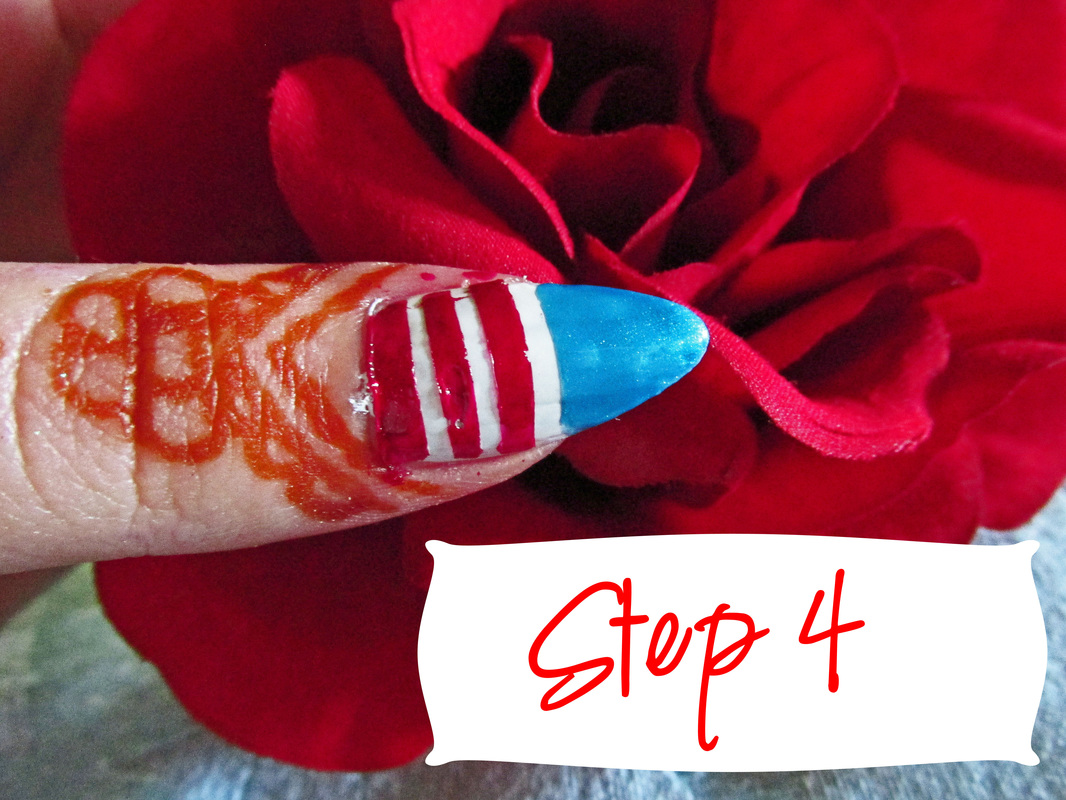
STEP 4
Your nail should look similar to this after you peel the tape away! Except, you know, you might have a few more stripes. |
|
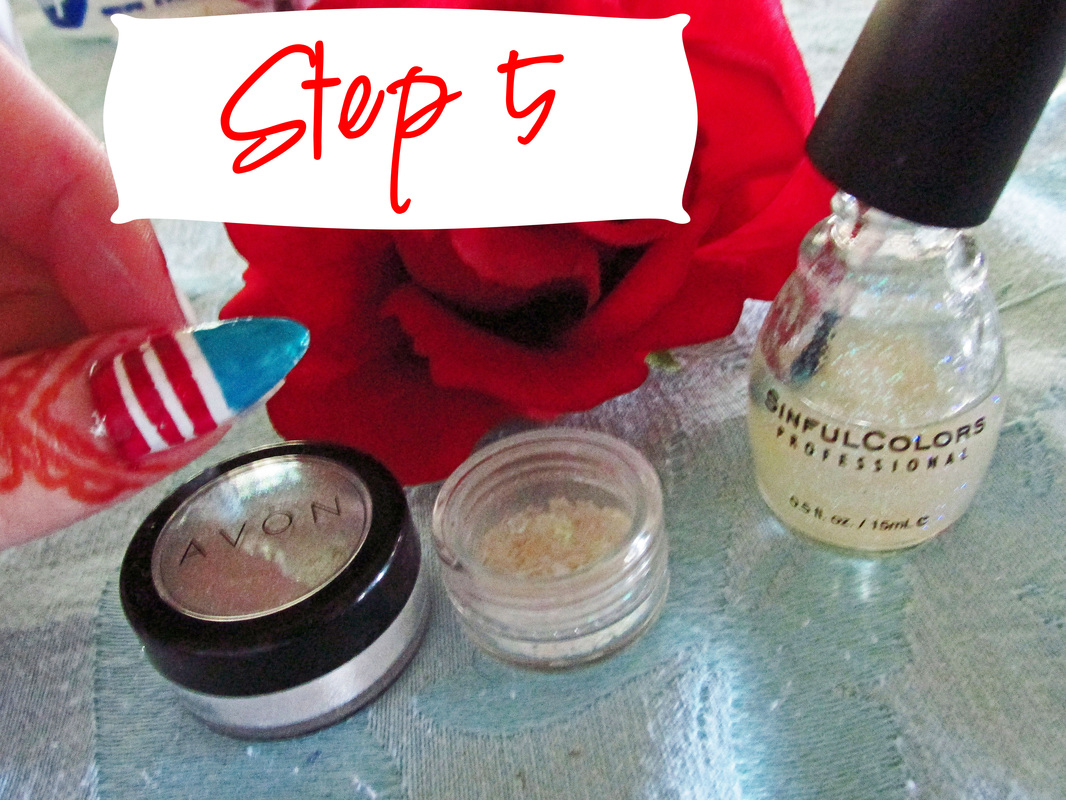
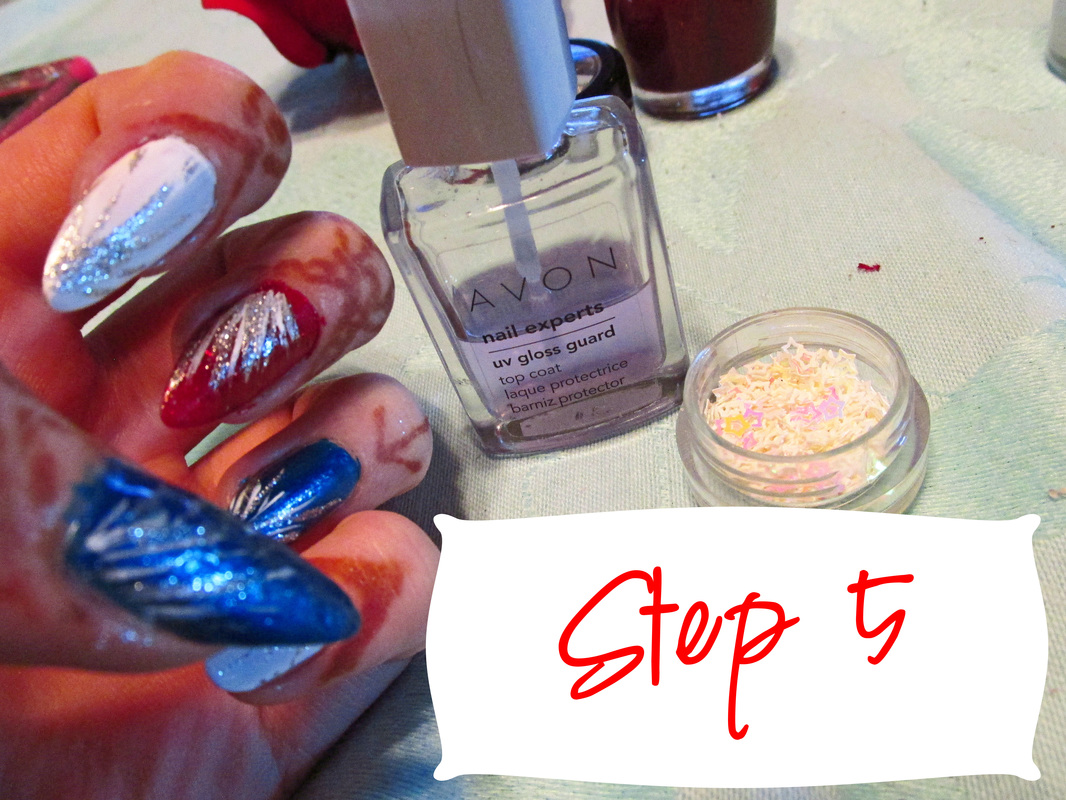
STEP 5
Gather your glitter, stars and glitter polish. Why I made this a separate step, I'll never know. |
|
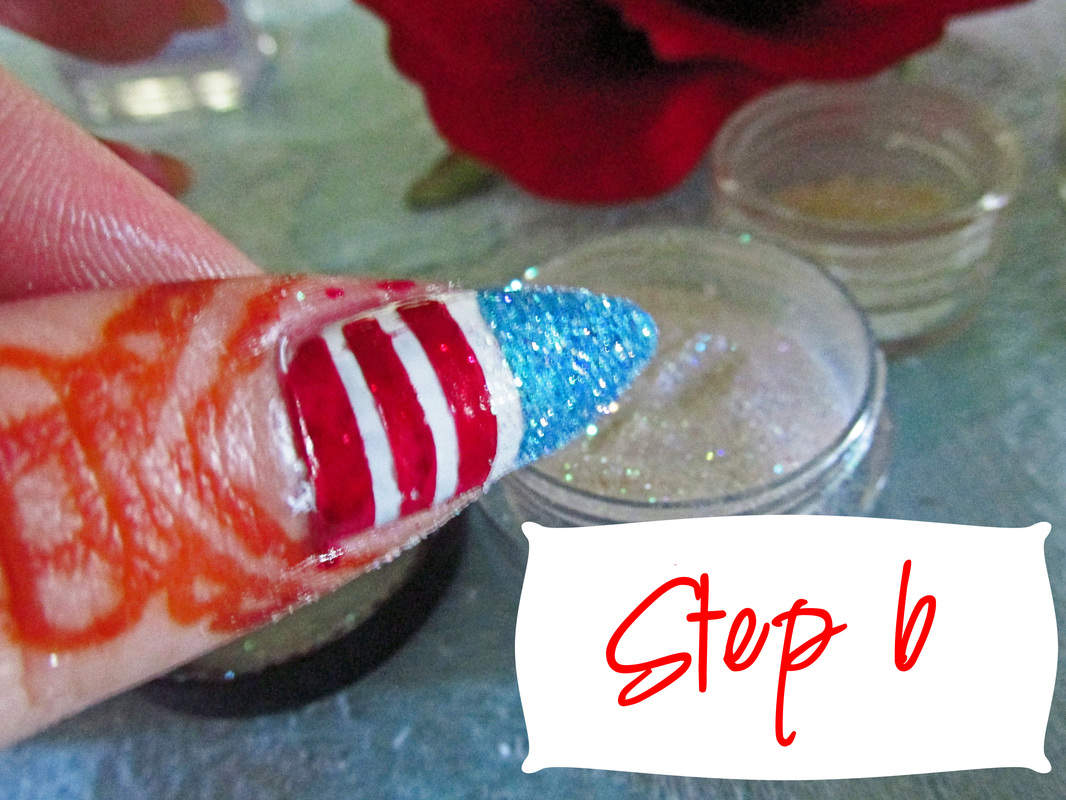
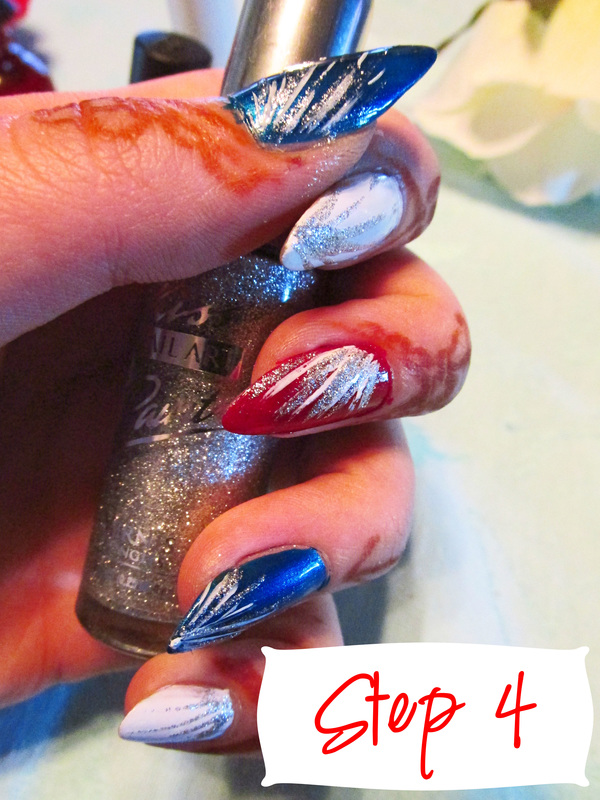
STEP 6
Paint the plain glitter on all of your nail, and wait for it to dry. Repaint just the tip of your nail, and then while the polish is still wet dip it into the glitter. Then use your top coat - Avon UV gloss guard - and paint over all of your nail. Then apply however many stars you'd like and seal them with another top coat of the clear. |
|
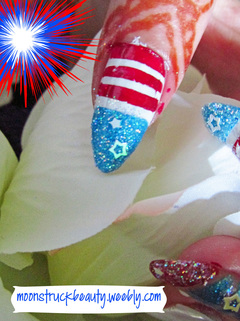
Finished!
As always, feel free to add your own twist with these nails. You can do a clear space, substitute the white for just a glitter coat, etc. Have fun! |
Baby, You're A Firework!
|
|
|
STEP 1
Paint your nails all white and let them dry. |
|
STEP 2
Take a toothpick and dip it into your blue color and apply dots in a circular pattern going outward. |
|
STEP 3
Continue going outward with that same blue color. It should look similar to mine, hopefully better! |
|
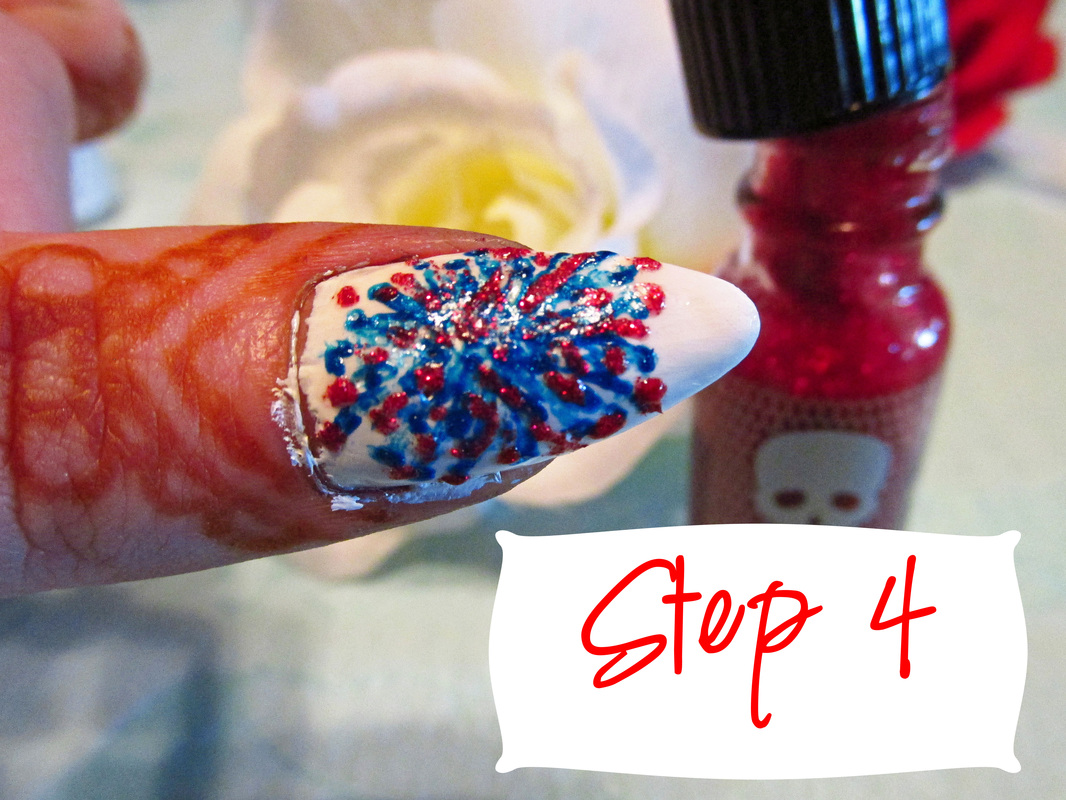
STEP 4
Take a new toothpick and dip it into your red then begin dotting and pulling the red through the white and blue. |
|
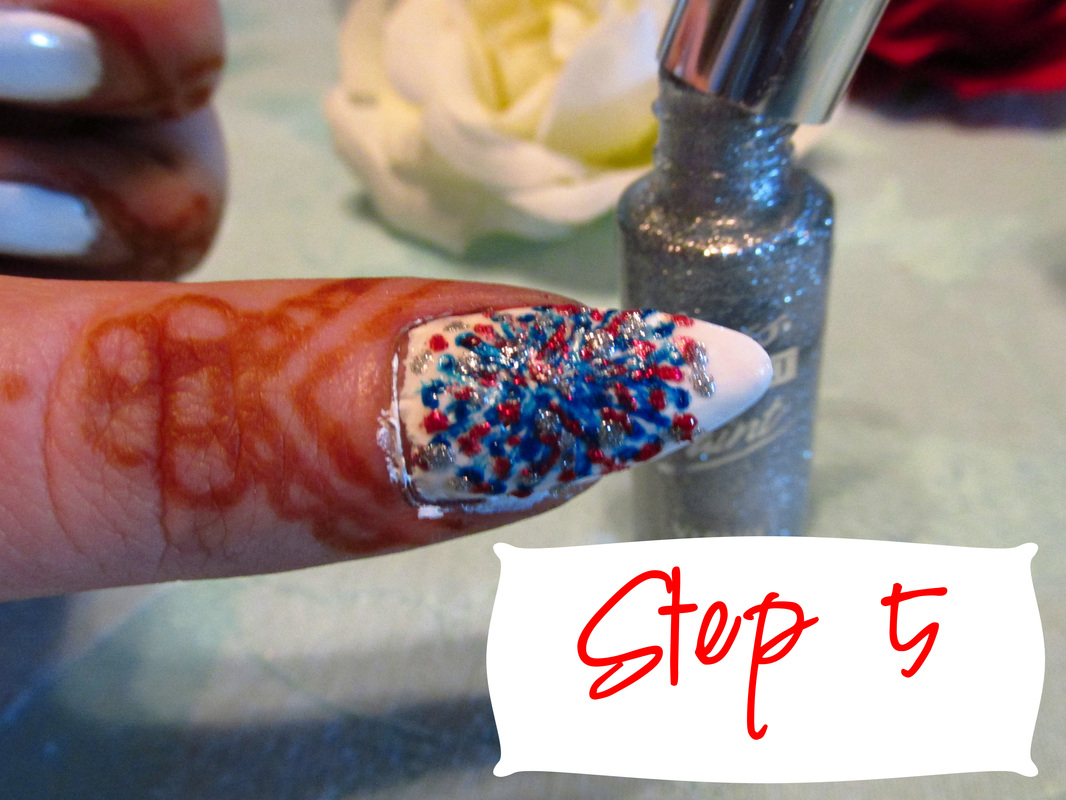
STEP 5
Then add in your silver/silver glitter on top of those other colors. This will give your nails that magical firework glow! |
|
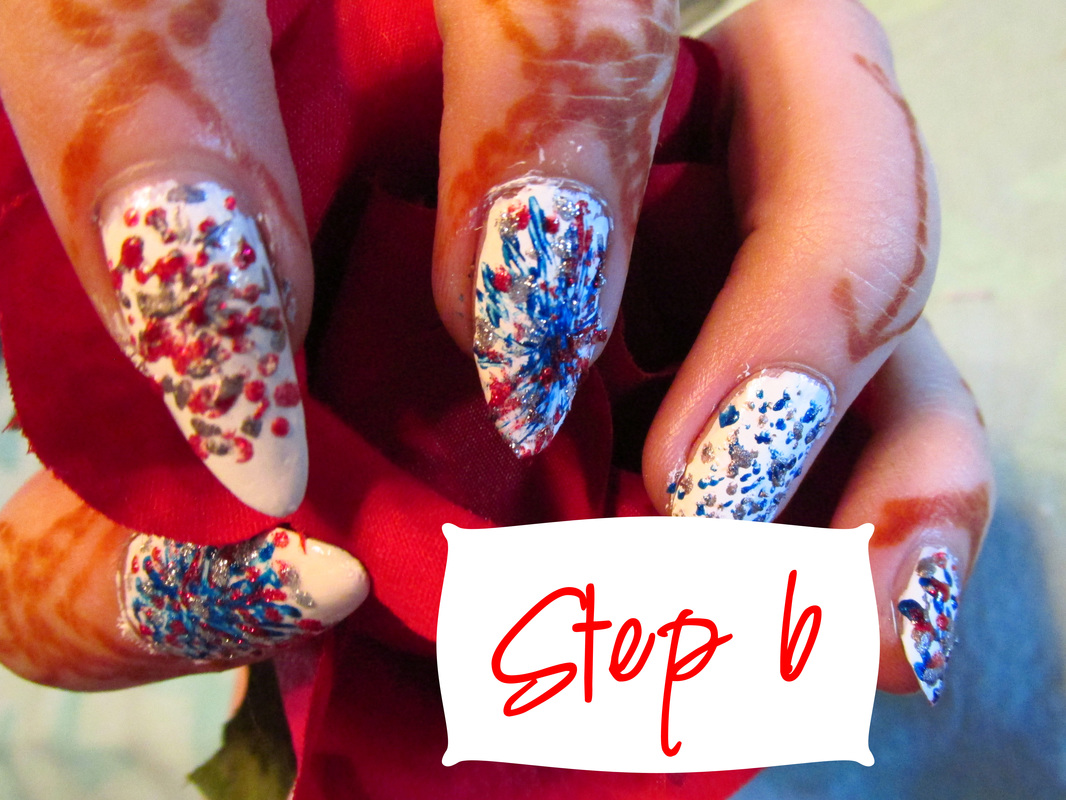
STEP 6
Sit and let dry. During this time you can also apply a top coat. |
|
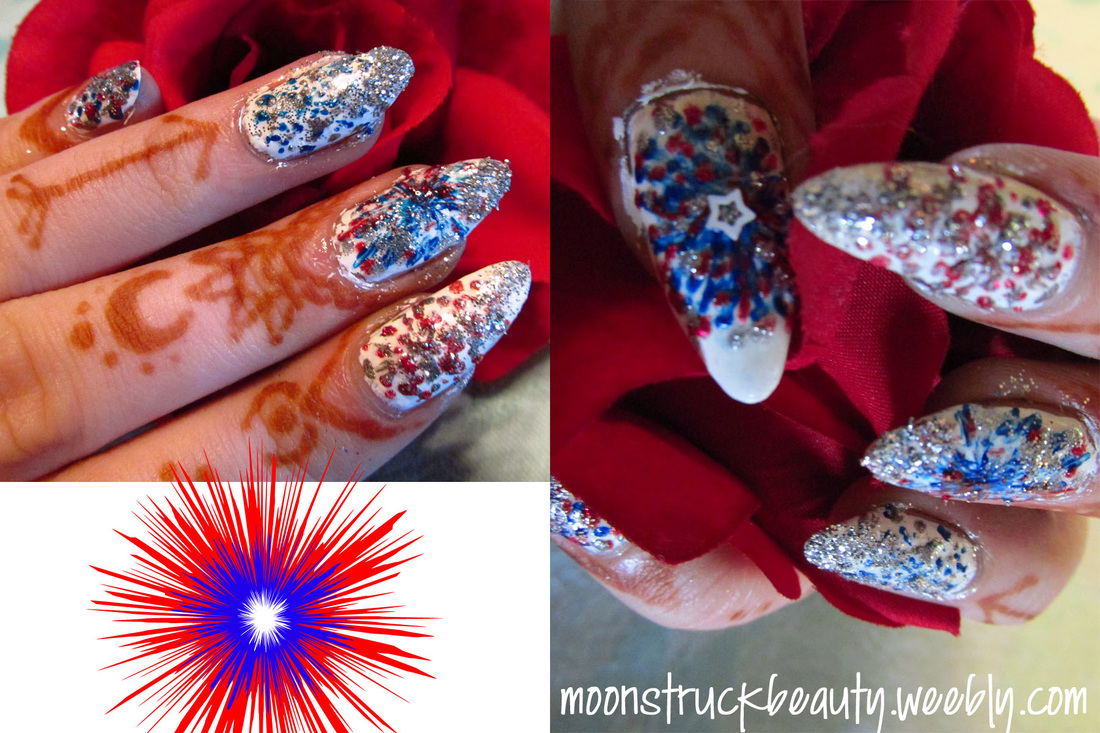
And there you have it! If you want a little extra POW to your nails, just paint on a clear coat, dip your nails into glitter, then apply another clear coat to seal it!
Have fun! |
Simple Fireworks
|
|
|
STEP 1, 2 & 3
My camera glitched and deleted step one, but that's okay! Step 1 is simple, just paint your base colors! I went blue, white, red, blue, white. You can do whatever color pattern you'd like! Step 2/3 - Take your white nail art polish and paint on wispy lines, then paint your clear coat on top of that. If you paint the clear coat on while the white is still wet it can add an even more dry brush wisp look. |
|
STEP 4
Take your silver nail art polish and add it between and on top of your white wisps. Doing this really adds that firework flare! |
|
STEP 5
Paint on a clear coat (UV guard, Avon) and drop some of your tiny stars wherever you think they look good! Once your stars are where you want them, apply another clear coat to keep them on your nail. |
|
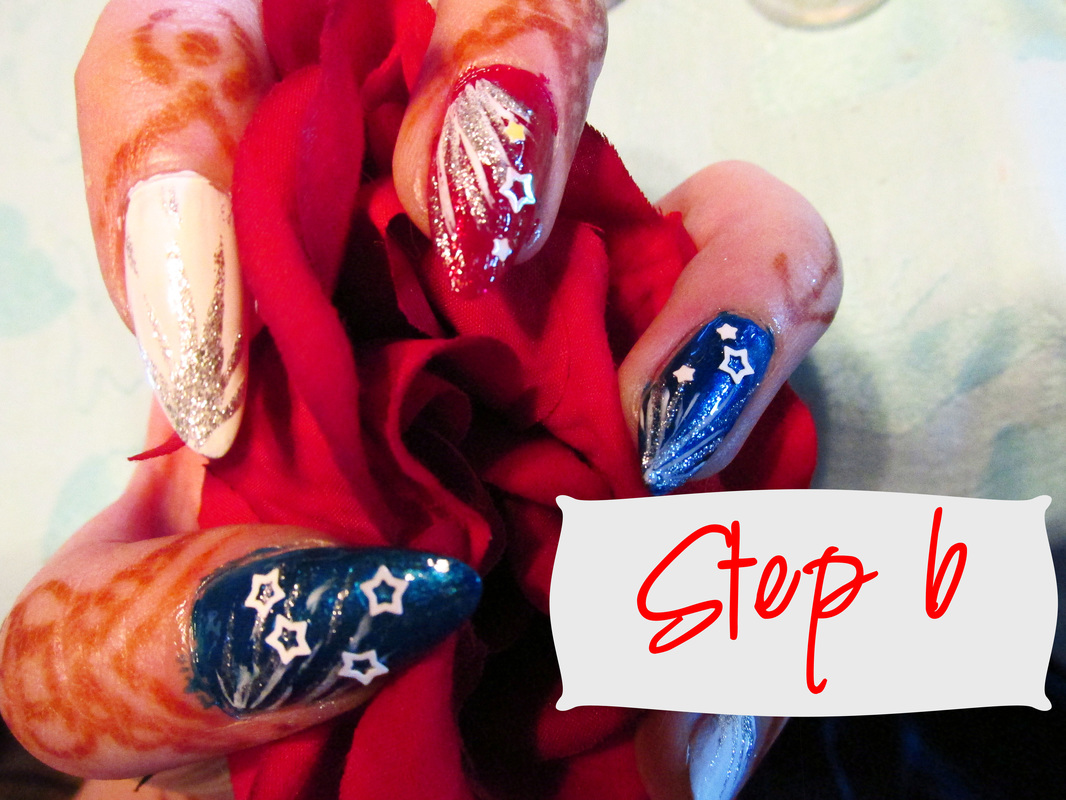
STEP 6
And there you have your stars! I only added them to the blue and red, because they wouldn't really show on the white. |
|
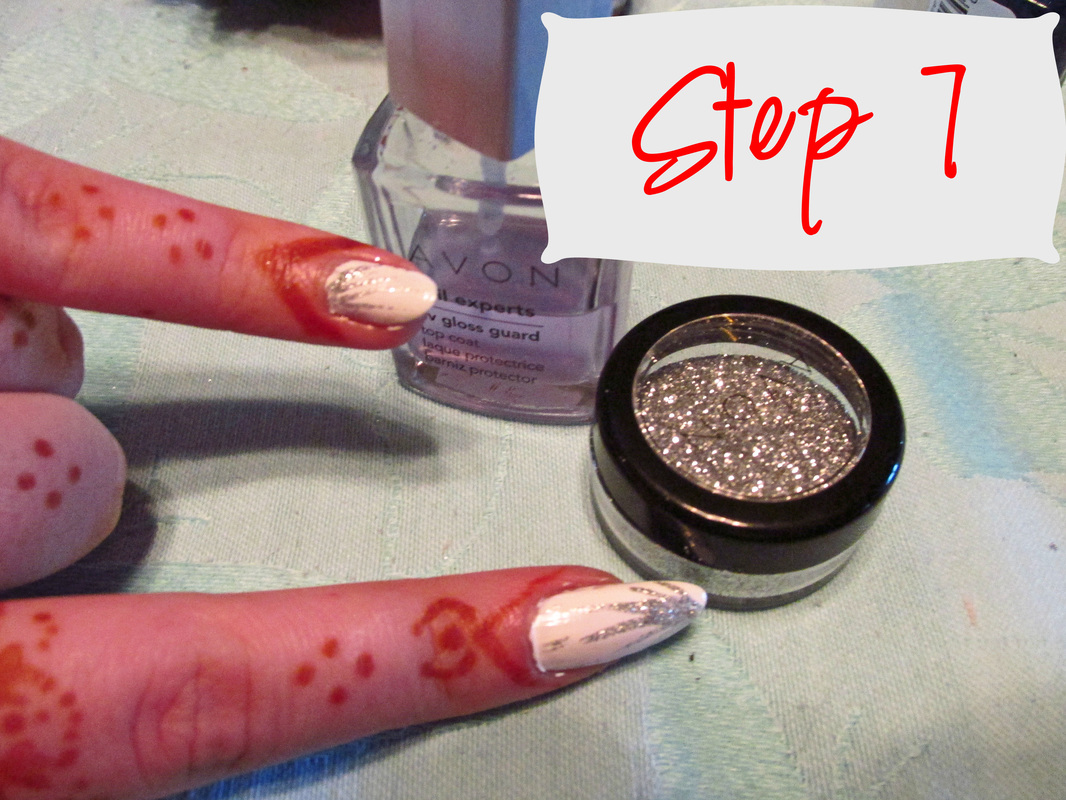
STEP 7
So what about the white? Grab that glitter! Paint on a clear coat, then dip or sprinkle the glitter onto your nail. After I dipped my finger in the glitter, I put another clear layer on to kind of spread the glitter around my nail so it had that fire cracker (not sure if there's a better way to say that) kind of look! |
|
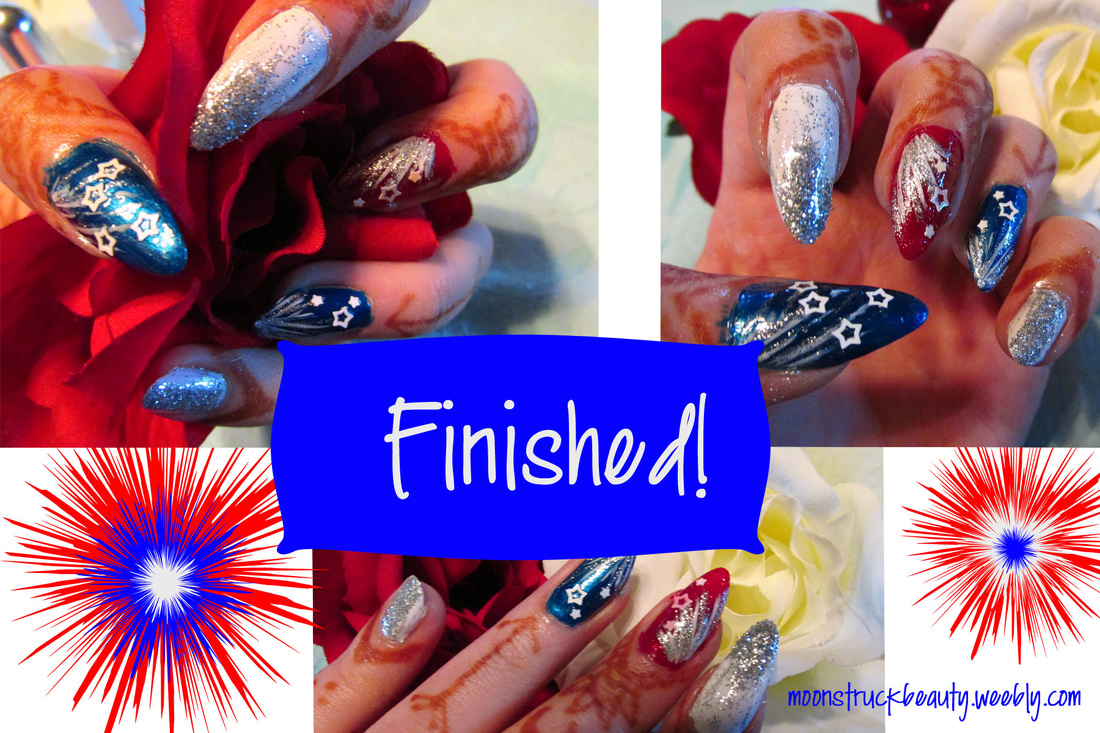
And there you have it! Cute and simple nails for the 4th!
Remember, always take your own little creative twist if you'd like! |
Have a fantastic 4th of July! Stay safe and have fun!
Need more for the 4th? Check out our list oflow calorie cocktails and beers!
Love what you see here? Follow us on social media!
IG
Need more for the 4th? Check out our list oflow calorie cocktails and beers!
Love what you see here? Follow us on social media!
IG


 RSS Feed
